
4 No-Tool Ways to Wind a Skein Into a Ball
Winding a skein into a ball comes down to two paths: use a swift and ball winder for speed, or wind by hand for control and portability. For most projects, a center-pull ball is the better result either way, since it sits still while you work and feeds from the middle without rolling off your lap. Whichever path you pick, keep the tension soft. The next section breaks down when to choose each method.
Using a ball winder and swift speeds up the process and produces a neat center-pull cake suitable for frequent projects with wool, cotton, or acrylic.
Hand-winding techniques like finger-wrap or figure-8 are gentle options for delicate fibers and require no equipment, making them ideal for on-the-go use.
Maintaining a loose tension during winding preserves yarn elasticity and prevents gauge issues caused by fibers stretching before knitting or crochet begins.
Proper skein preparation, including untwisting and finding the working end, significantly reduces tangles and makes winding more efficient.
Rewinding a tightly wound cake or fixing a lost center tail can be done easily by unwinding a few outer layers or working backwards carefully, avoiding the need to restart altogether.
Table of Contents
Which Method Should You Use to Wind Yarn Into a Ball?
The right method depends on how much yarn you have, what fiber it is, and whether you own a winder. Each approach trades speed for control in a different way.
Ball winder + swift: the fastest option, producing a neat center-pull cake in a couple of minutes. Best for wool, cotton, and acrylic skeins you wind often.
Hand-winding: slower but gentler, and it travels well since it needs no equipment. Better suited to delicate fibers like silk or mohair, where a machine’s steady pull can stress the strand.
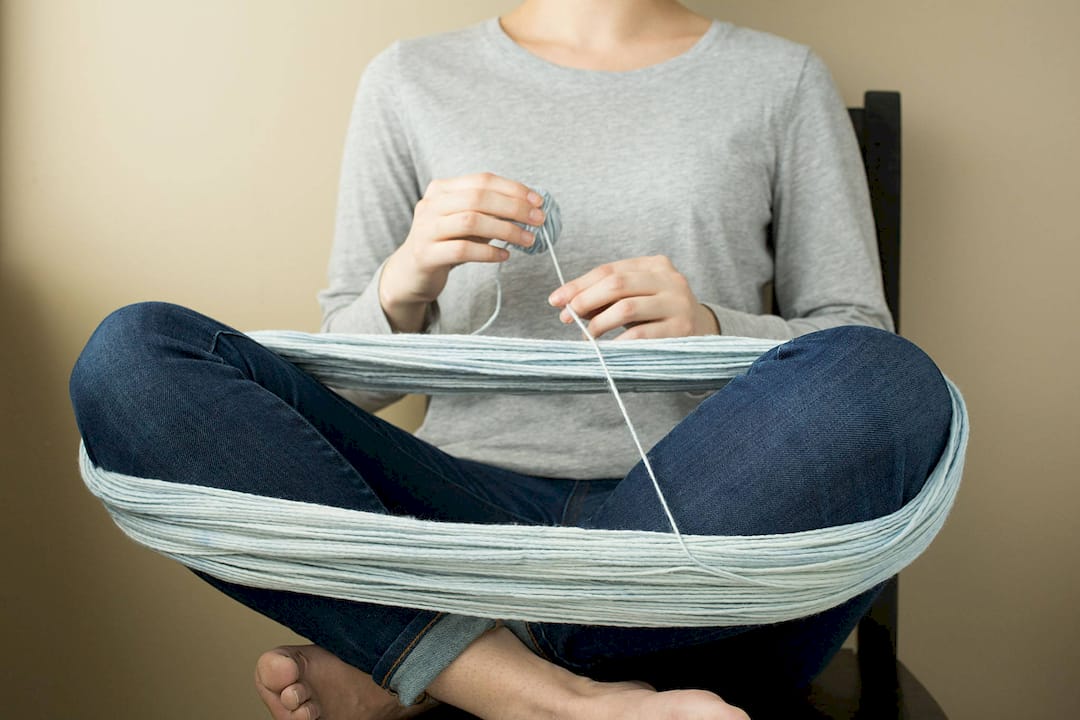
Knees or chair-back method: a one-person workaround for holding a hank steady when there’s no swift and no helper around.
If you’re winding one skein for a weekend project, hand-winding is fine. If you’re prepping a dozen skeins for a blanket, a winder earns its price fast.
How Do You Open a Skein and Find the Working End?
A skein arrives twisted into a loop, and unwinding it wrong is the single biggest cause of tangled messes. Handle it in this order:
Untwist the skein gently, working with the twist rather than yanking it apart, then lay it flat on a table or your lap.
Locate the paper label and the loose ties. Most skeins have one thicker strand knotted around the bundle. That is not yarn. Set it aside once you’ve confirmed which end is which.
Cut or slip off the smaller ties while keeping the main loop under control. Draping the skein over a chair back, your knees, or a helper’s outstretched hands keeps it from collapsing into a tangle the moment the ties come off, a trick The Crochet Project outlines for winding with no equipment at all.
Find the two loose ends. One usually sits at the outer edge, the other buried inside the loop. Pull the outer one to start winding an outer-pull ball, or work from the inner one if you want a center-pull ball from the start.
Skip this prep and you’ll spend more time untangling than winding.
How Do You Set Up and Use a Swift and Ball Winder?
Clamp the ball winder to one edge of a table and the swift a couple of feet away, adjusting the swift’s diameter to match the hank’s spread so the yarn feeds without dragging. Both tools need to sit steady. A wobbly clamp is the most common cause of a jammed cake halfway through.
Loop the opened skein around the swift’s arms and give it a spin to check it rotates freely before you start winding.
Thread the yarn through the winder’s tension guide, then secure it in the notch at the top of the spindle.
Turn the handle at a slow, steady pace. Watch for snags on the swift and pause to redistribute yarn if the cake starts bulging on one side.
Once the skein is fully wound, slide the finished cake off the spindle carefully so it keeps its shape.
Tools cut winding time dramatically. Hand-winding a single skein can take 15 to 20 minutes, while a swift and winder combination often finishes the same skein in a few minutes.
Pro Tip: If the cake feels rock hard when you pull it off, don’t force the working end. Unwind the outer few layers by hand first and rewrap them loosely. It softens the whole cake without undoing your progress.
What Are the Best Hand-Winding Techniques Without a Winder?
No winder, no problem. Four hand methods cover nearly every situation, and each one builds a workable ball without any equipment.
Finger-wrap technique. Wrap the yarn around two or three fingers about a dozen times to build a soft core, then slide it off your hand. Continue wrapping around the core itself, rotating it roughly 45 degrees every few passes so it grows into a ball rather than a lopsided lump. This is the method wikiHow walks through in detail for building a center-pull structure by hand.
Thumb-wrap technique. Anchor the yarn across your palm and wrap in criss-cross passes over your thumb instead of straight loops. The crossed pattern keeps the layers from cinching tight against each other, which matters more than most beginners expect.
Figure-8 method. Wind the yarn in a figure-8 motion around two fingers, then fold the figure-8 in half and continue wrapping around that folded core. This produces one of the more reliable center-pull results you can get without a machine.
Cardboard or spool method. Wrap yarn around a cardboard square or an empty spool for small leftovers or mini skeins, then slide it off once you have a manageable core to hand-wind around. It’s a fast way to keep scraps organized instead of loose in a bag.
Whichever technique you use, keep the very first tail loose and visible as you build the core. If it disappears under the first few wraps, you’ll be hunting for it later.
Pro Tip: Stop the moment you feel a snag rather than winding through it. Fixing a small tangle takes seconds; unwinding a cake to reach a buried knot takes a lot longer, a point Instructables makes well in its step-by-step hand-winding guide.
Should You Wind a Center-Pull Ball or an Outer-Pull Ball?
Center-pull is the better default for most projects, and here’s why it wins in practice.
Center-pull balls stay put. They don’t roll off the couch, across the floor, or under furniture while you work, which matters most for portable projects and anything you knit or crochet outside the house.
Outer-pull balls wind faster and can reduce added twist in single-ply yarns, since the yarn feeds off the outside without pulling against itself.
To keep the center tail accessible, pinch it with a finger or trap it against your palm as you build the first several wraps, a habit that JennyKnits recommends specifically to avoid losing it inside the cake.
Consider re-winding by hand if a machine-wound cake comes out too tight to pull from cleanly. A quick loosening pass on the outer layers fixes it without unwinding the whole thing.
Why Does Winding Tension Matter for Yarn Care?
Winding too tightly stretches the fibers and can quietly shift your gauge before you’ve cast on a single stitch. A ball wound hard as a rock has already lost some of its natural give, and that shows up in drape and stitch definition later.
Keep the core slightly airy rather than compressed. Wrap loosely around your fingers for the first several rounds, and squeeze the forming ball occasionally. A recommended practitioner test is simple: if it springs back under light pressure, the tension is right. If it feels dense and unyielding, loosen up.

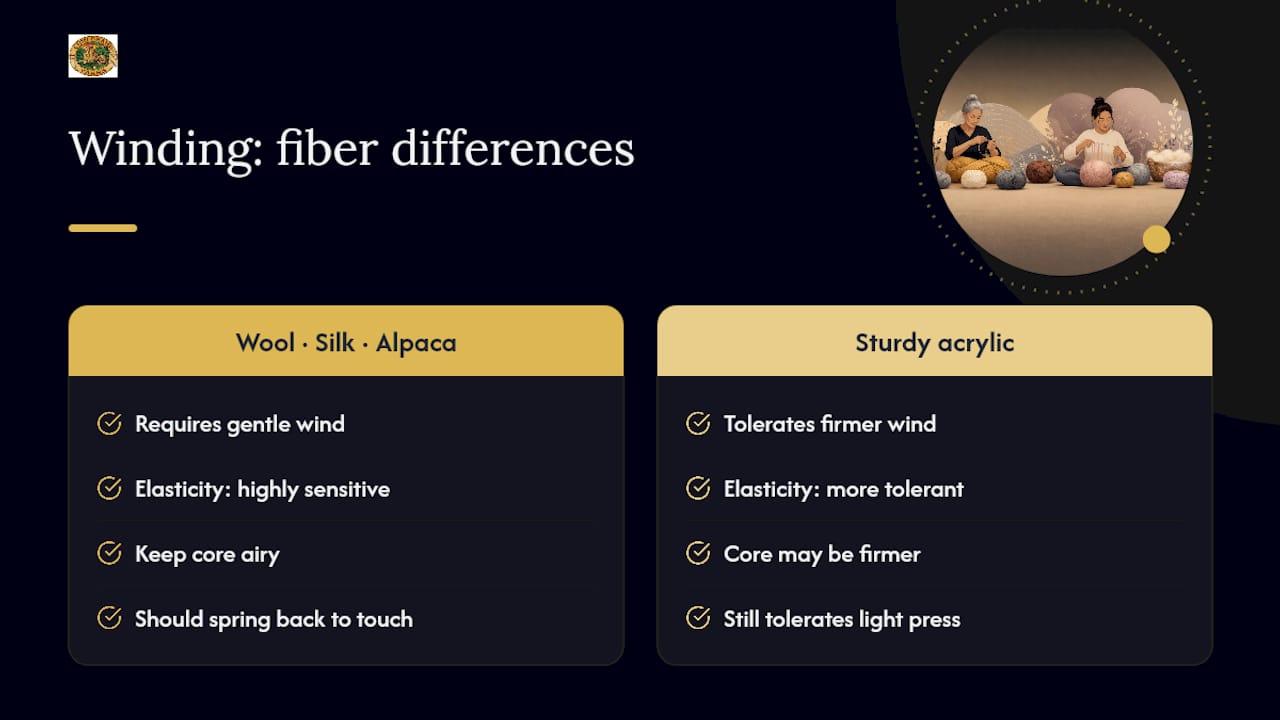
Fiber matters here too. Wool, silk, and alpaca need a gentler hand than sturdy acrylics, which tolerate a firmer wind without losing their shape. Sandi Rosner’s winding guide makes this a central point: a relaxed core preserves elasticity, and that elasticity is what gives finished stitches their bounce.
How Do You Fix a Lost Center, Knots, or a Hard Cake?
Winding problems are almost always fixable without starting the ball over.
Lost center tail: work back a small number of outer wraps by feel rather than tearing into the cake. The tail is usually just a few layers deeper than you think.
Knots: loosen the strand around the knot instead of pulling it tight, then work the loop open with a fingernail or blunt needle.
A cake wound too hard: unwind a handful of outer layers and rewrap them loosely rather than fighting the tight core as it is.
Yarn vomit (the tangled explosion that happens when an old ball collapses): lay the mess flat, find one end, and work outward in small sections rather than pulling from the middle, which only tightens the snarl.
Take on Winding by Hand vs. by Machine
Every Lion Brand pattern and free tutorial assumes the yarn ahead of it is properly prepped, which starts with a well-wound ball. Hand-winding remains the right call for delicate fibers and for crafting on the move, where a swift just isn’t practical. A ball winder earns its keep once you’re prepping several skeins a week or working through large blanket quantities, where the time saved adds up fast.
Speed Up Yarn Prep With the Right Tools
Hand-winding works fine for one skein at a time, but it stops being practical once you’re prepping a full blanket’s worth of yarn or restocking a project bag every weekend. The Yarn Ball Winder II turns a full skein into a neat center-pull cake in a couple of minutes, compared to the 15 to 20 minutes hand-winding typically takes for the same amount of yarn.
It’s a practical add-on for anyone who winds yarn regularly rather than occasionally, and it pairs naturally with a swift for hands-free operation. Once you’ve got a cake ready to go, cast on something simple to test it, like the Knit Bandana, which needs just one wound ball from start to finish. Browse the Yarn Ball Winder II product page to see current pricing and add one to your crafting kit.
Sources
For readers who want to see the hand methods in action, a few outside guides walk through the motions with photos step by step, alongside Lion Brand’s own project and tool pages for what to do once your yarn is wound.
FAQ
Should I Wind My Skein Into a Ball Before Starting?
Yes. A skein straight off the shelf is prone to tangling as you work, while a wound ball, especially a center-pull one, feeds smoothly and stays in place.
How Do I Wind Yarn Into a Ball Without a Ball Winder?
Use a hand method like the finger-wrap, thumb-wrap, or figure-8 technique, building a soft core first and rotating it as you wrap to keep it round. All three work well without any equipment.
What Tool Is Used to Wind Yarn Into Balls?
A ball winder paired with a yarn swift is the standard combination, with the swift holding the open skein steady while the winder builds the cake. The Yarn Ball Winder II is built for exactly this setup.
How Do You Wind a Ball of Yarn With a Ball Winder?
Secure the winder and swift, thread the yarn through the tension guide, and turn the handle at a steady pace while watching for snags until the full skein forms a cake. The whole process usually takes just a few minutes.
Why Shouldn’t I Wind My Yarn Too Tightly?
Winding too tight stretches the fibers and can throw off your gauge before you even start a project, especially with wool, silk, or alpaca. Keep the core slightly airy and check that it springs back under a light squeeze.