
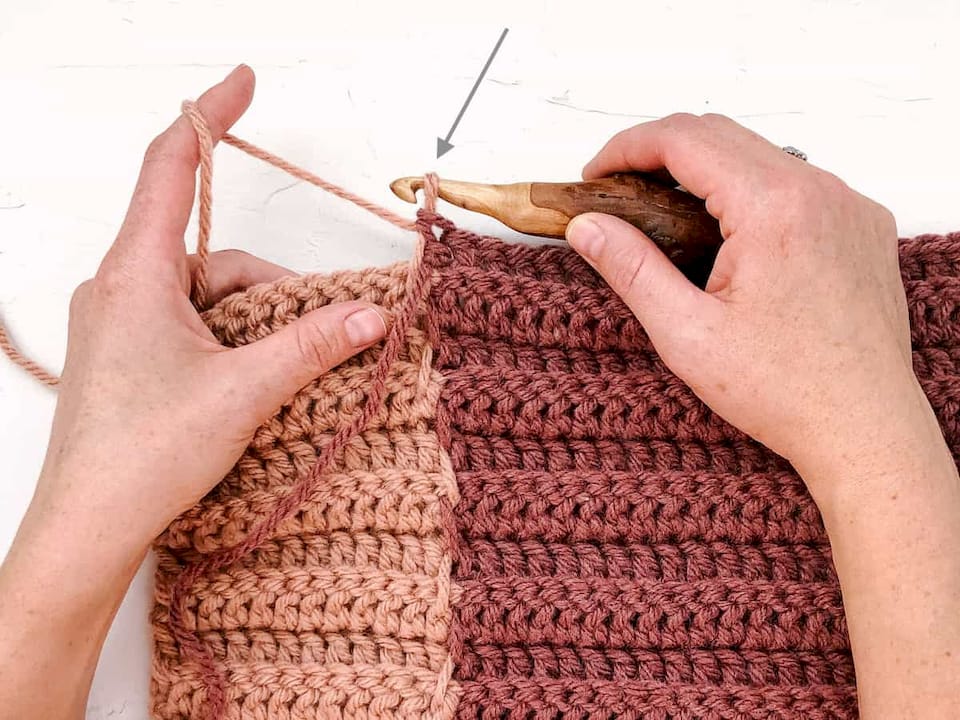
How to Change Colors in Crochet Without Ruining Your Stitches
Change color on the final yarn-over of the previous stitch. That single habit is what separates a clean, invisible join from a lumpy one. This rule works the same way across single crochet, half-double crochet, and double crochet: you finish the last step of the old stitch with new yarn instead of old, so the fresh color sits ready at the top of the next stitch.
Once the switch happens, you have two paths forward:
Carry the old color inside your stitches (tapestry crochet) if you’ll need it again soon.
Drop it and pick up a bobbin (intarsia) if you’re working a large, separate block of color.
Key Takeaways
Clean color changes in crochet come down to one habit: switching yarn on the final yarn-over of the previous stitch, every time.
| Point | Details |
|---|---|
| Master the golden rule | Always finish the last stitch’s final yarn-over with the new color for an invisible join. |
| Choose carry vs. bobbins | Use tapestry crochet for frequent changes, intarsia bobbins for blocks over 8 to 10 stitches. |
| Leave real tails | Cut 4 to 6 inch tails and weave them in two directions to prevent loosening over time. |
| Adjust tension and hook size | Go up one hook size for carried yarn to avoid puckering and keep joins snug, not tight. |
| Practice on real projects | Lion Brand’s No Notes Scarf and Converging Colors Afghan each target a specific technique. |
Table of Contents
How to Change Colors in Crochet, Stitch by Stitch
The mechanics shift slightly depending on which stitch you’re working, but the logic never changes: stop one step early and finish with the new color.
Single crochet: Insert your hook, yarn-over, and pull up a loop as usual, leaving two loops on the hook. Drop the old yarn, yarn-over with the new color, and pull through both loops. The new color completes the stitch and starts the next one.
Half-double crochet: Yarn-over before inserting the hook, pull up a loop (three loops on hook), then switch colors on that final pull-through.
Double crochet: Work the stitch until exactly two loops remain on the hook. Lay the new yarn over the hook in place of the old, and pull through those last two loops.
Tension trips up more people than the color switch itself. Pull the new strand snug enough that no gap shows, but not so tight that the next stitch puckers. If the first stitch looks loose, tug gently on the tail before continuing. It usually tightens right up.
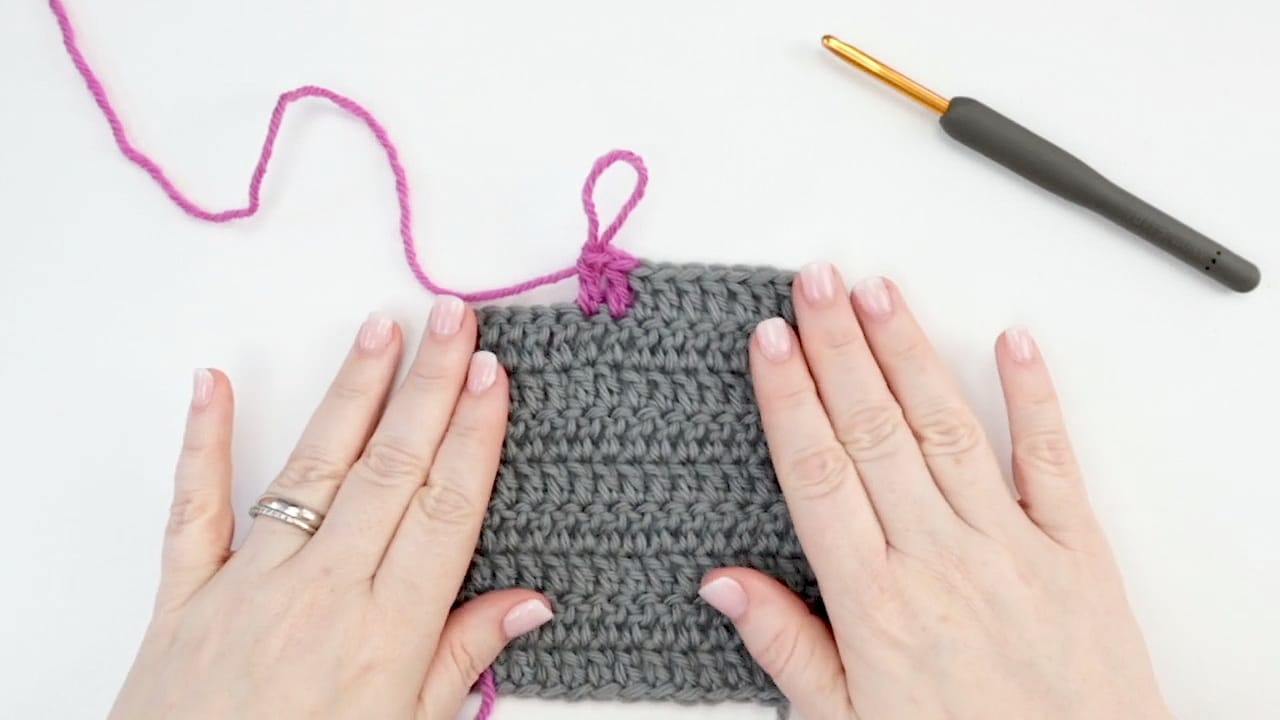
Pro Tip: Test your join on a scrap swatch before starting a big project. Two minutes of practice saves you from ripping out an entire row later.
Changing Colors at the End of a Row or Round
Row-end and round-end joins follow the same golden rule, with a couple of extra decisions layered on. Finish the last stitch of the row with the new color, chain the required turning chains in that new color, then turn and keep going.
Working in the round gets trickier because there’s no natural turn to hide a color switch. That’s where standing stitches and jogless joins come in:
A standing stitch lets you start the new round with the new color without a chain-and-turn, which keeps the fabric flatter.
A jogless join shifts the first stitch of the new round slightly to disguise the visual “step” that color changes create in rounds, common in striped hats and amigurumi.
For reversible projects like blankets or scarves seen from both sides, tapestry crochet gives a neater result on both faces than leaving floats on the back.
Mid-Row Color Changes: Tapestry Crochet vs. Intarsia
This is where most crocheters get stuck choosing an approach, and the choice really comes down to how often colors repeat across a row.
Tapestry crochet works best for frequent, small changes. You carry the unused yarn inside your stitches and crochet right over it, which hides the strand completely and keeps the back nearly as tidy as the front. It’s the go-to method for polka dots, small geometric repeats, and graphgan-style pixel work.
Intarsia is built for bigger jobs. When a color block runs wider than roughly 8 to 10 stitches, carrying yarn across that distance creates long floats that snag fingers and rings. Use separate bobbins or mini-skeins for each color section instead, and twist the old and new yarns once at the back every time you switch. That twist is what keeps a hole from opening at the color boundary.
Keep bobbins wound loosely so they unwind without tangling.
Arrange colors in the order they’ll be used, left to right, before you start the row.
Untangle bobbins every few rows rather than waiting until they’re knotted into a mess.
Pro Tip: If a pattern mixes both techniques, tapestry for the small repeated motifs and intarsia for the large background block, work the intarsia sections first. It’s easier to carry a single strand through finished blocks than to weave bobbins around already-carried yarn.
Managing Tails So They Never Work Loose
Short tails are the number one reason color joins fail after a few washes. Leave at least a 4 to 6 inch tail on both the old and new yarn, every single time you switch colors. Six inches is the safer minimum if you’re new to weaving, since a shorter tail leaves no room to correct a mistake.
Thread the tail onto a metal tapestry needle.
Weave through the back loops for at least 1.5 to 2 inches, changing direction once partway through instead of running in one straight horizontal line.
Trim the excess close to the fabric once the tail feels locked in place.
Weaving in at least two directions is what actually locks a tail down against repeated washing, especially in machine-washable blankets and garments that see regular use. Crocheting over the tail as you go is faster and fine for scrap projects, but it tends to leave a slight bump. Save it for pieces where speed matters more than a flawless back side.
Tools and Small Hacks for Colorwork
A metal tapestry needle glides through stitches more precisely than plastic, which matters when you’re weaving through tight single crochet. Keep a few bobbins or wind mini-skeins for intarsia work, and use a small bowl or clip to keep each color separate and untangled.
For stranded or tapestry sections, go up one hook size from what the pattern calls for. Carried yarn inside stitches adds bulk, and a slightly larger hook keeps the fabric from puckering.
Fixing Gaps, Puckers, and Visible Jogs
Most color-change problems trace back to tension or carry distance, and none of them require ripping back your work.
Gap at the join: Twist the old and new yarns once at the back, then snug the new strand before working the next stitch.
Puckering from carried yarn: Relax your grip, go up a hook size, or carry the yarn over fewer stitches at a time.
Floats peeking through: Shorten the carry distance, switch to intarsia for spans over 8 to 10 stitches, and block the finished piece to even out any remaining tension differences.
Pro Tip: A quick steam block fixes minor tension inconsistencies around color joins better than any amount of yarn-tugging while you’re still working the piece.
Lion Brand Resources for Practicing Color Changes
Reading about color changes only gets you so far. Step photos and video demonstrations of the last-yarn-over method help the technique click faster than text alone, and Lion Brand’s pattern library gives you real projects to practice on:
The No Notes Scarf is built around striped color changes, ideal for drilling the end-of-row join.
The Converging Colors Afghan uses large color-blocked panels, perfect for practicing the intarsia-versus-tapestry decision.
The Apple Blossom Necklace is a small motif project that forces you to nail neat tails in a tight space.
Smooth, machine-washable yarns with consistent ply make every one of these joins easier to execute cleanly. Browse Lion Brand’s free pattern library for more colorwork projects sorted by skill level.
What Actually Matters When You Change Colors
Most tutorials treat every color change like it needs the same fix, and that’s where the advice starts to fall apart. A striped baby blanket and an intarsia color-block afghan have almost nothing in common in terms of technique, and treating them the same is why so many beginners get frustrated with “the” method for switching colors. There isn’t one.
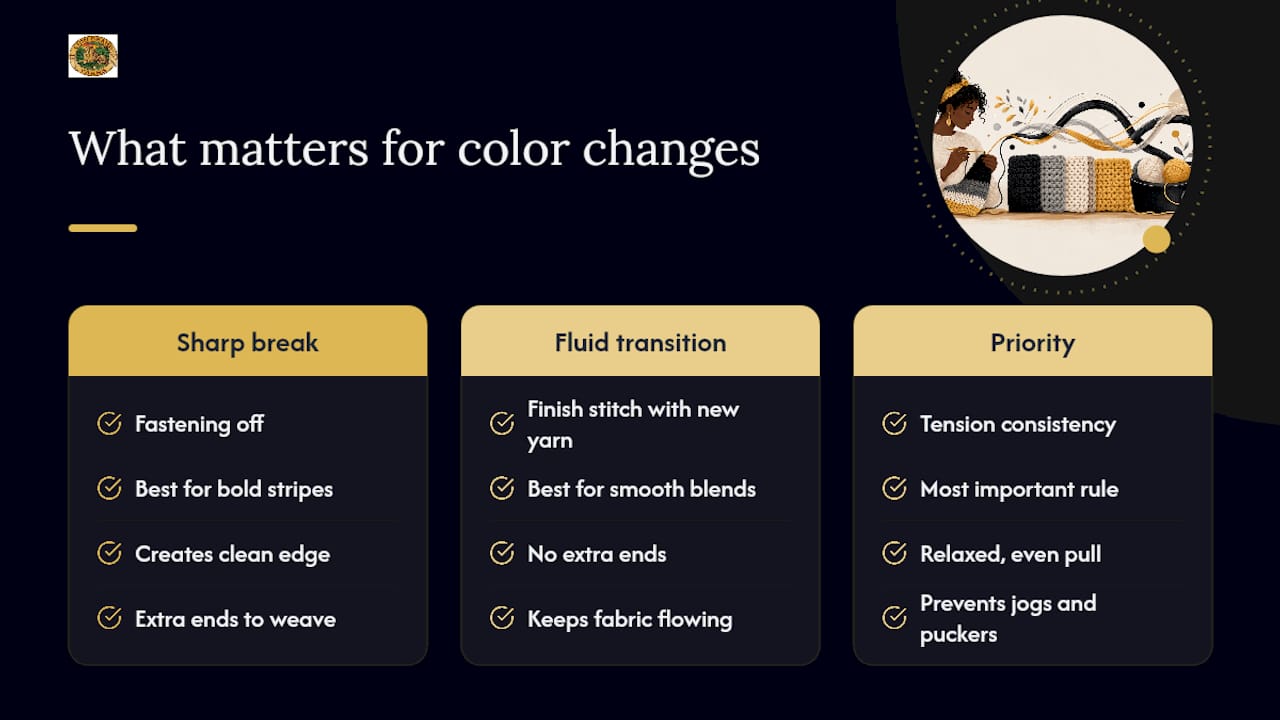
The conventional wisdom leans hard on fastening off and rejoining for a sharp break between colors. That works beautifully for bold stripes. It’s overkill for fluid transitions where finishing the stitch with new yarn keeps the fabric moving without extra ends to weave. Choosing between those two isn’t about skill level. It’s about what the finished piece needs to look like.
If there’s one thing worth prioritizing over every other tip in this piece, it’s tension consistency across the join, not any single trick or tool. Crocheters who tighten their new strand too aggressively cause more visible jogs and puckers than crocheters who simply carry yarn the “wrong” way. Get a relaxed, even pull at the switch point first. Everything else, tail length, hook size, carrying method, is secondary once that habit is solid.
Shop Lion Brand Patterns Built for Color-Change Practice
Reading instructions only gets you halfway there. Working an actual pattern designed around color changes is what turns the last-yarn-over rule into muscle memory, and Lion Brand’s pattern library has three projects built for exactly that.
The No Notes Scarf is a straightforward way to drill row-end joins across dozens of stripes in one project. The Converging Colors Afghan forces the tapestry-versus-intarsia decision on a larger scale, so you leave it understanding both techniques instead of just one. The Apple Blossom Necklace is small enough to finish in an evening, which makes it a low-stakes way to practice tail weaving before committing to a full-size piece.
Pair any of these with a smooth, machine-washable yarn like Wool-Ease or Vanna’s Choice, both of which hold consistent tension across color joins better than novelty textures do. If you’d rather ease in gradually, start with a small swatch using scrap yarn in two colors before casting on the full blanket. Once the join feels automatic, pick your pattern and get started.
Sources
FAQ
What Is the Best Way to Change Colors While Crocheting?
Switch yarn on the final yarn-over of the previous stitch rather than starting a new stitch with the new color. This places the color change at the top of the stitch, where it blends in almost invisibly.
How Do I Make an Invisible Color Change in Crochet?
Work the stitch until one step remains, then complete that final yarn-over with the new yarn instead of the old. Snug the new strand gently rather than pulling it tight, since over-tightening causes the visible pucker most beginners mistake for a bad join.
Can I Change Colors in Crochet Without Cutting My Yarn?
Yes, carry the unused color inside your stitches using tapestry crochet whenever you’ll need that color again within a few stitches. This avoids extra tails entirely and works especially well for frequent, small color repeats like polka dots.
How Do I Change Yarn in the Middle of a Row?
Work up to the last yarn-over of the stitch before your color change, then finish that stitch with the new color and continue. For color blocks wider than about 8 to 10 stitches, drop to intarsia with a separate bobbin instead of carrying the yarn that far.