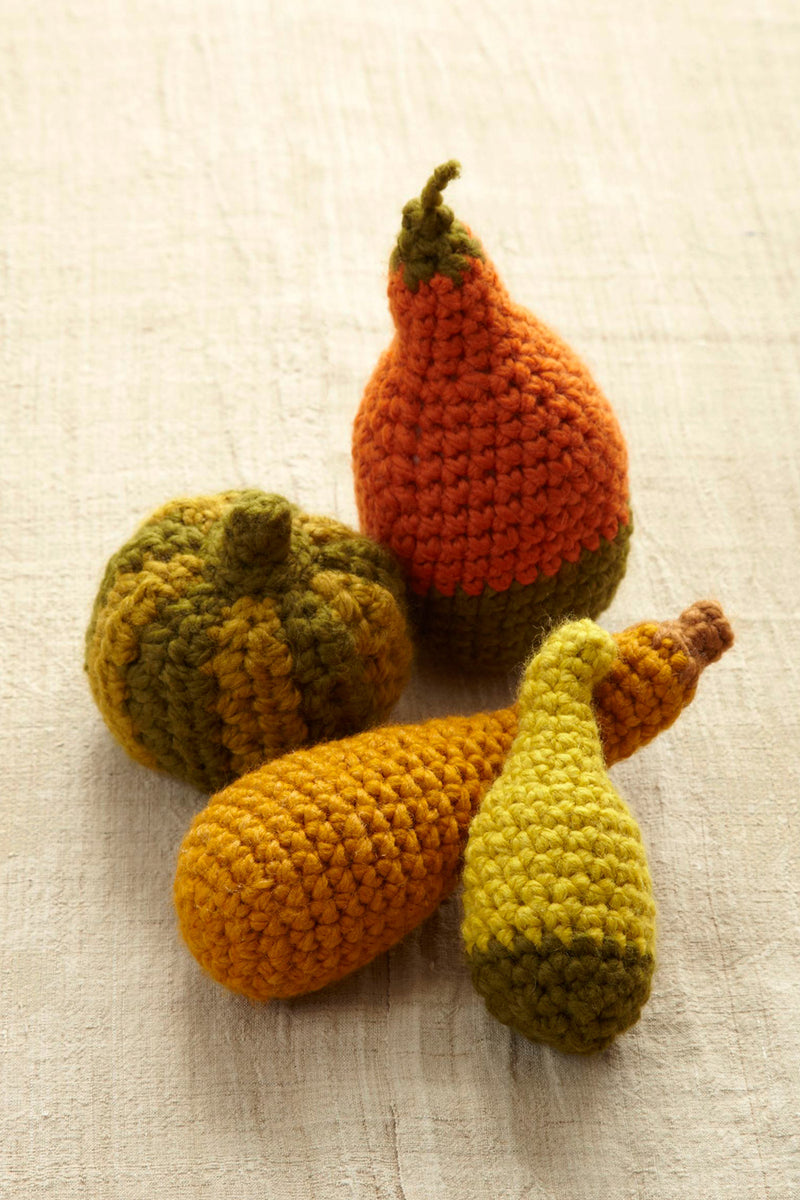
MATERIALS To
change colors, click the drop-down list or swatches above
QUANTITY
PRICE
ALT QTY
Note: (A)
Note: (B)
Note: (C)
Note: (D)
Note: (E)
Note: (F)
Additional Materials Fiberfill stuffing
Thanksgiving Gourds
Lion Brand® Wool-Ease® Thick & Quick®
GAUGE:
Exact gauge is not essential to this project.
STITCH EXPLANATION:
sc2tog (sc 2 sts together) Insert hook into st and draw up a loop. Insert hook into next st and draw up a loop. Yarn over, draw through all 3 loops on hook - 1 st decreased.
NOTES:
1. Work in continuous rnds; do not join or turn unless otherwise instructed.
2. To change color, work last st of old color to last yarn over. Yarn over with new color and draw through all loops on hook to complete st.
PEAR GOURD
Beg at base, with A, ch 2. Rnd 1: Work 6 sc in first ch. Place marker in first st for beg of rnd; move marker up as each rnd is completed. Rnd 2: Work 2 sc in each st around - 12 sts. Rnd 3: *2 sc in next st, sc in next st, rep from * around - 18 sts. Rnd 4: *2 sc in next st, sc in each of next 2 sts, rep from * around - 24 sts. Rnd 5: *2 sc in next st, sc in each of next 3 sts, rep from * around - 30 sts. Rnds 6-9: Sc in each st around. Change to B. Rnds 10-13: With B, sc in each st around.
Rnd 14: *Sc2tog, sc in each of next 8 sts, rep from * around - 27 sts. Rnd 15: *Sc2tog, sc in each of next 7 sts, rep from * around - 24 sts. Rnd 16: *Sc2tog, sc in each of next 6 sts, rep from * around - 21 sts. Rnd 17: *Sc2tog, sc in each of next 5 sts, rep from * around - 18 sts.
Begin stuffing piece. Continue to stuff as work progresses. Rnd 18: *Sc2tog, sc in the next st, rep from * around - 12 sts. Rnds 19-22: Sc in each st around. Change to A. Rnd 23: With A, (sc2tog) around - 6 sts. Rnd 24: Sc in each st around.
Fasten off, leaving a long tail.
FINISHING
Draw tail through top of Gourd, pull together tightly and knot. Knot tail again about 2 in. (5 cm) away for 'stem'.
Weave in ends.
BUTTERNUT SQUASH
Beg at base, with C, ch 2. Rnds 1-4: Rep Rnds 1-4 of Pear Gourd. Rnds 5-9: Sc in each st around.
Beg stuffing piece. Continue to stuff as work progresses. Rnd 10: *Sc2tog, sc in each of next 6 sts, rep from * around - 21 sts. Rnd 11: Sc in each st around.
Rnd 12: *Sc2tog, sc in each of next 5 sts, rep from * around - 18 sts.
Rnd 13: Sc in each st around.
Rnd 14: *Sc2tog, sc in each of next 4 sts, rep from * around - 15 sts.
Rnd 15: Sc in each st around.
Rnd 16: *Sc2tog, sc in each of next 3 sts, rep from * around - 12 sts.
Rnd 17: Sc in each st around.
Rnds 18-24: With D, (sc2tog, sc in each of next 3 sts, work 2 sc in next st) twice - 12 sts. Change to D. Rnd 25: (Sc2tog) around - 6 sts. Rnds 26 and 27: Sc in each st around.
Fasten off.
FINISHING
Sew top of Gourd closed.
Weave in ends.
BI-COLOR SQUASH
Beg at top of Squash, with E, ch 2. Rnd 1: Work 6 sc in first ch. Place marker in first st for beg of rnd; move marker up as each rnd is completed. Rnds 2 and 3: Sc in each st around. Rnds 4 and 5: Sc2tog, sc in next st, work 2 sc next st, sc in each of next 2 sts - 6 sts.
Beg stuffing piece. Continue to stuff as work progresses. Rnd 6: Sc in each of next 2 sts, work 2 sc in next st, sc in next 3 sts - 7 sts. Rnd 7: Sc in each of next 2 sts, work 2 sc in the next st, sc in each of next 4 sts - 8 sts. Rnd 8: Sc in each of the next 2 sts, work 2 sc in next st, sc in each of next 4 sts, work 2 sc in the last st - 10 sts. Rnd 9: Sc in each next 2 sts, work 2 sc in the next st, sc in each of next 6 sts, work 2 sc in last st - 12 sts. Rnd 10: *2 sc in next st, sc in next st, rep from * around - 18 sts. Rnds 11-15: Sc in each st around. Change to A.
Rnds 16 and 17: With A, sc in each st around. Rnd 18: (Sc2tog) around - 12 sts. Rnd 19: Sc in each st around.
Fasten off.
FINISHING
Sew Base of Squash closed.
Weave in ends.
GREEN PUMPKIN
Notes:
1. Pumpkin is worked from top to bottom in rows.
2. Do not ch 1 at the beg of rows; just turn.
With F, ch 11. Row 1: Sc in 2nd ch from hook, sc in next ch, (work 2 hdc in next ch) 6 times, sc in each of last 2 ch. Row 2: Turn, sc in each of next 2 sts, (hdc2tog) 6 times, sc in each of last 2 sts. Change to A. Row 3: Turn, sc in each of next 2 sts, (work 2 hdc in next st) 6 times, sc in each of last 2 sts. Row 4: Rep Row 2. Change to F. Row 5: With F, Rep Row 3. Row 6: Rep Row 2. Change to A. Rows 7-18: Rep Rows 3-6. Rows 19 and 20: With A, rep Rows 3 and 4.
Fasten off.
BASE
With A, ch 2. Rnd 1: Work 6 sc in first ch. Place marker in first st for beg of rnd; move marker up as each rnd is completed. Rnd 2: Work 2 sc in each st around - 12 sts. Rnd 3: *2 sc in next st, sc in next st, rep from * around - 18 sts.
STEM
With F, ch 2. Rnd 1: Rep Rnd 1 of Base. Rnd 2: Working throughthe back loops ONLY, sc in each st around - 6 sts. Rnd 3: Sc in each st around. Rnd 4: Rep Rnd 2 of Base.
Fasten off.
FINISHING
Sew first and last rows of Pumpkin together to form a tube. Sew Base to one end and stuff firmly. Sew Stem to top of Pumpkin.
Weave in ends.
ABBREVIATIONS / REFERENCES Click for explanation and illustration
Thanksgiving Gourds Reviewed by Shelley Falla on 2011-10-12
These were fun to make and worked up quickly. I used some cotton worsted weight yarns I had and did different version of a couple of them. I found one discrepancy in the pattern for the bi-colour gourd but it was easy to fix.
When you are in New York City, visit the Lion Brand Yarn Studio at 34 W. 15th Street for a one-of-a-kind yarn lover's experience.
For more information, visit the website, LionBrandYarnStudio.com