
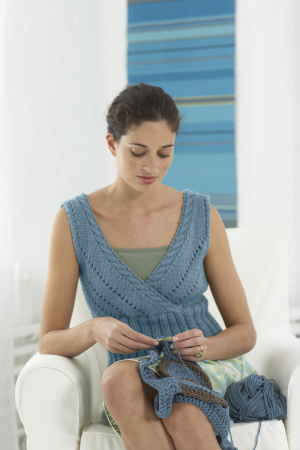
![]() Welcome to our 2013 Spring Knit-Along! I am very happy to host this event and hope that many of you will join in and knit along with me. The Tranquil Tank Top is a winner of a project for many reasons! It is a great piece to add to a wardrobe and just as great a project to teach some new knitting techniques. This top is perfect for all-season wear. For spring, it would be great over a cooler-weather top or a sleeveless dress for a little added warmth. For summer, it will be perfect over a camisole top and even for fall and beyond, a perfect layer piece over another longer sleeved top.
Welcome to our 2013 Spring Knit-Along! I am very happy to host this event and hope that many of you will join in and knit along with me. The Tranquil Tank Top is a winner of a project for many reasons! It is a great piece to add to a wardrobe and just as great a project to teach some new knitting techniques. This top is perfect for all-season wear. For spring, it would be great over a cooler-weather top or a sleeveless dress for a little added warmth. For summer, it will be perfect over a camisole top and even for fall and beyond, a perfect layer piece over another longer sleeved top.
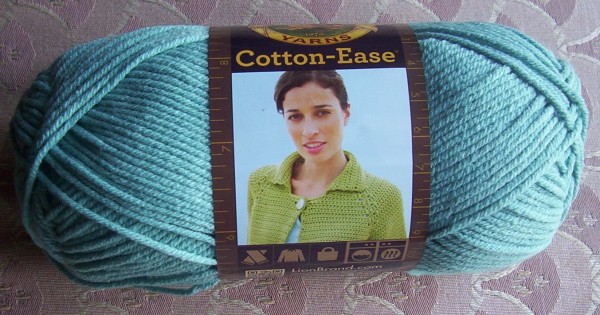
Since this is our Spring Knit-Along, I decided to knit this in a cooler yarn – in a very “tranquil” blue. Choosing what yarn to use is always important when planning a project, and for me is half the fun! The original yarn used in this pattern was Vanna’s Choice, which comes in so many great colors. For warmer weather, I chose Cotton-Ease in a calming blue called “Seaspray”. For this pattern you will want a heavier worsted-weight yarn like Vanna’s Choice, Cotton-Ease or Recycled Cotton. Last week, Ashley gave us yarn amounts we will need for these yarns in each of the three sizes – so just find a size and then you will know how much yarn you will need. Zontee also suggested Kitchen Cotton and Martha Stewart Crafts™ Cotton Hemp for other 100% natural options–just be sure to calculate exactly how many skeins you’ll need for each.
Making the size you want is also essential. There are three sizes included in this pattern, and sometimes is can be difficult to determine which size to make. What I usually do is pull out a sweater or vest of mine similar to what I am making and take some measurements. If you have sleeveless top or vest that you like (and also like the way it fits), then I would measure across the bust, multiply times 2 and then you can determine which size will be best for you. I measured a summer top I like and it measured 40” around, so I will make the large size which has a finished bust of 42”. The ribbing around the bottom of the sweater will pull in around the mid to lower half of the top, so I think this is a good choice for me.
When I printed out the pattern, I noticed that there were six separate charts for the fronts and then saw that there were two charts (a left and right front) for each of the three sizes. I will make sure that I put the charts I will not be using away so there is less chance I will mistakenly start another size! So, now comes the other very important element in making sure that this top will turn out just the size I want … making the gauge swatch. I know the time I take in getting the correct gauge will ensure that I will make the right size and get used to working with the yarn before I start.
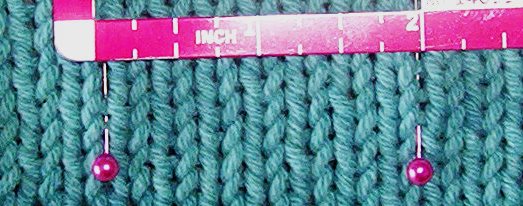
When I was looking at the gauge, I noticed that the gauge given was for the stitch pattern in the charts, rather than the “pattern stitch,” which is ribbing. So, looking at the charts, I saw that the chart pattern is a diagonal lace pattern with 5 stitches of stockinette stitch between each lace eyelet. From other patterns I have made, I thought that the gauge would be close to stockinette stitch. And since I noticed that the back of this sweater above the ribbing is all stockinette stitch, I realized that stockinette stitch is part of the pattern. I decided to get a gauge of 14 stitches to 4” (3 ½ stitches to the inch) to see how it would look. This would mean knitting the yarn at a looser gauge than is on the label, but I did get the gauge with a size US 10 needle and then tried the gauge with a sample of the diagonal eyelet pattern above it. The way I determined the gauge was to cast on 20 stitches and, with 3 stitches of garter on each side, I worked 14 stitches of stockinette stitch within this border. Then I measured 2 inches of stitches in the middle to get a very accurate gauge for stockinette stitch. Placing straight pins on each side of these stitches makes it much easier to measure. The correct gauge for 2” should be 7 stitches…and it is! I am not going to worry very much about the row gauge as the stitch gauge is more important to get the correct width.
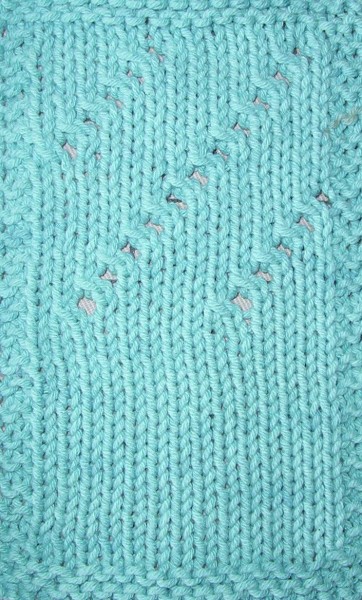
Then, I decided to continue with a sample of the diagonal lace pattern in the charts on the same swatch as my stockinette stitch. I could see that since the stitch did not pull in or make the swatch wider, that this gauge is correct. It looks good to go! So, for everyone joining our Knit-Along, just find which needles will give you a gauge of 3 ½ sts to 1” in stockinette stitch (knit on the right side, purl on the wrong side) and you will find the needles you will use for the entire project!
I will write down on my pattern the needle size I need to use, since mine is different than the size in the pattern. Now I am already starting the back which is just K2, p2 ribbing for 9”. I love working with this cool and very pretty blue yarn.
Happy Spring and happy knitting until next week!
Related Links:
You must be <a href="https://blog.lionbrand.com/wp-login.php?redirect_to=https%3A%2F%2Fblog.lionbrand.com%2Ftranquil-tank-top-knit-along-part-1%2F">logged in</a> to post a comment.
Laura
I was wondering how I could get the pattern stitches in my gauge after trying to start with the pattern stitches frustrated my efforts. Thank you.
Marian
I was just wondering if you could incorporate the metric equivalents to the sizes. It would help us Canadian and British. Thank you.
Zontee
Hi Marian, gauge is actually given in 4-inch increments because it’s approximately 10 cm, making it easy to translate (so it’s 14 stitches per 10 cm). If you click through to the pattern, there are metric equivalents given for all inch measurements. Hope that helps!
Sarah
What type of cast on are you using?
Zontee
Hi Sarah, we’d recommend a long-tail cast on or another cast on that has a little bit of stretch. Hope that helps!
Debbie
Hi I made up my swatch using the suggested 14 stiches for 20 rows of the chart pattern. I only had a wideth of 3 inches but my length came out perfect at 4 inches. Should the correct gauge be a sqaure or is correct length what I was looking for?
Ashley Tedesco
Hi Debbie! Generally speaking with gauge swatches, the width is the most important thing. Often, a pattern will tell you to knit until the piece is ten inches long, for example, so the number of rows it takes you to get there doesn’t matter and can be unique to your own knitting style. In this case, you’ll want to change your gauge to ensure that your 14 stitches are four inches across, and don’t worry if that adds to the length. I hope this helps!
Terrie R
I love that color! Is that the “Lake” or the “Seaspray” colorway of Cotton-ease?
Zontee
Hi Terrie, it’s Seaspray–Heather mentions it in the 2nd paragraph 🙂 Hope that helps!
Dorothy Bush
Thank you Heather for hosting this knit along. I am making this one for my daughter in a light green. Have got the ribbing done for both front and back and working on the back section now. The front will be the challenge for me.
Kate
I just knit my swatch with Cotton Ease on 8s. I have 5 sts per inch. I am aiming for an xs/s size as a 38 bust ( s/m) will be way too big. Do you think that should do it?
Zontee
Hi Kate, it will probably be much too small–since gauge is over the entirety of your fabric, even very small changes in gauge add up quickly!
Let’s look at the cast-on amounts for the 3 sizes: 66, 72, and 82.
66 stitches ÷ 5 stitches per inch (your gauge) = 13.2 inches for the front (or 26.4 inches for the bust which is the measurement around the front and back)…too small for an adult.
Even the Large size cast-on of 74 will give you 14.8 inches for the front (or just shy of 30 inches around) and the XL cast-on of 82 will give you 16.4 inches for the front (or 32.8 inches around), so if you follow those directions, those are the bust sizes you’d get…which are pretty small.
BUT we can still use math to figure out what gauge you should get if you want to make a smaller top.
If you’re looking for a bust size of 34 inches (for which we’d want half for the front and half for the back or 17 inches across one piece), using the Small directions, let’s do the math:
66 stitches ÷ 17 inches = 3.88 stitches per inch (or approx 15.5 stitches per 4 inches), which is the gauge you’d be looking for.
For a 35 inch bust, you’d aim to get a front width of half of that or 17.5 inches (35 inches ÷ 2 pieces = 17.5 inches per piece).
66 stitches ÷ 17.5 inches = approx 3.77 stitches per inch (or approx 15 stitches per 4 inches) which is the gauge that YOU will want to get in order to follow the smallest directions and get a smaller top.
Hope that helps!
Carma
Zontee I understand your answer, but as a small adult (until I was 35) I had a 22in waistline, a 30in bustline, and 38in hips. So I would have had to use larger needles for hips, smaller needles for waist after I found my bust size gauge.
Kate
Thank you for your help. I will work on getting that count
Dorothy Bush
I think there is a missing row in the pattern. On the back when you begin the decreases for the armhole, there is dec of 4 on the knit, then a decrease of 4 on the purl, a knit row, a purl row.. then a row where you decrease one stitch on either end. The pattern then says to repeat these two rows 3 (5,7, or whatever) times… but it doesn’t mention what the purl row is. I am assuming it’s a straight purl across to end up with the correct number of stitches. Can someone clarify?
Gina S.
Hi Dorothy, not sure if you’re still waiting on an answer or not – but I’m just at this point of the pattern myself and what I understand is, it says do one row knit, one row purl, then you start the decrease 1 stitch on either end row and then it says “rep last 2 rows X amount of times” – the last 2 rows are the purl (straightforward, nothing fancy) row, and the decrease one stitch on either end row. Then you continue on until the armholes measures whatever, in normal stockinette stitch.
Hope that helps!
Diane True
When you are swatching for gauge; I just learned that you want to be sure and block your swatch before measuring to get an accurate picture of what your finished project will be like. For me this means that I need to go down in needle size to get a smaller stitch gauge (pre blocking) as after blocking my stitch gauge is always a bit bigger. Thoughts on when to measure stitch count.. before or after blocking?
Zontee
Hi Diane, you’re right that it’s best to measure after blocking. As you use certain yarns over and over again, you’ll have a sense of which ones tend to change after blocking, and which ones don’t. I find that acrylics don’t change as much as softer animal fiber blends for instance. Hope that helps!
Karen
I too will need to size down to a xs/s what guage should I strive for?
Karen
Actually, after giving this more thought, am I able to knit this in a size xs/s? I am not that experienced a knitter, so I would need some guidance in adjusting the pattern. A bust size of 35/36 would probably work for me.
Zontee
Hi Karen, you sure can. Instead of adjusting the pattern, I generally recommend that you simply adjust the gauge, since that will affect the overall size of the fabric created. You know that 66 stitches gives you the front width of smallest current size (approx 19 inches or half of the 38 inch bust measurement) at the current recommended gauge, which is 14 stitches over 4 inches (or 14 ÷ 4 = 3.5 stitches per inch).
If you want to follow the directions for the smallest current size but get a 35 inch bust, you’d aim to get a front width of half of that or 17.5 inches (35 inches ÷ 2 pieces = 17.5 inches per piece).
66 stitches ÷ 17.5 inches = approx 3.77 stitches per inch (or approx 15 stitches per 4 inches) which is the gauge that YOU will want to get in order to follow the smallest directions and get a smaller top.
Hope that helps!
Karen
Thanks Zontee, I’ll work on a new swatch today! I am using Cotton Ease.
Jenna
I have never made a swatch and I do not know how to measure it once I make it. I am so lost. Should I start with a size 9 needle as the pattern calls for and see if it matches the stitch count. Help!
Zontee
Hi Jenna, yes, the needle size in the pattern is a good place to start. If you measure and you have too many stitches per inch, you’ll need a bigger needle size. If you’re getting too few stitches per inch, you’ll need a smaller needle. Hope that helps!
Jenna
I think so thanks. This is my first big project and I would still consider myself a little more advanced than a beginner beginner.
Janet
I’m glad others asked about sizing down. I too need a smaller size and will now try different size needles for a smaller gauge rather than trying to adjust the pattern. Anxious to get going on it.
Karen
To measure the length of the ribbing, do I measure from the cast on edge to the bottom of the needle, or to the top of the needle?
Zontee
Bottom of the needle. The loops on your needle don’t count as a finished row–they’re a row-in-progress. Hope that helps!
Tamie R. Neal
Are we to finish within a certain time frame?
Zontee
Hi Tamie, the knit-along will have blog posts over about 6 weeks, but you’re welcome to work at your own pace. Some people like to finish a major element each week in time for the next blog post, but there’s no pressure. The blog posts stay up afterwards, so you can always refer back to them. For more questions on how to participate, check out our guide: http://blog.lionbrand.com/2009/03/04/a-guide-to-kalscals/
cpb
I am enjoying this pattern a lot and making my first top for myself
Chele
Here in Australia our wool(Yarn) is sold by ply 3-4 ply for baby wool 8 ply is most general and 12 ply thicker wool how do I work out what type of wool you would need for a garment
Ashley Tedesco
Hi Chele,
This pattern calls for a worsted weight yarn, which should be closest to your 8-ply. As with any project that requires precise sizing, you’ll have to do a gauge swatch to ensure your knitting is yielding the correct number of stitches per inch. I hope this helps!
Lois
Can I add sleeves? How do I compute the number of armhole stitches?
Kay Tibbits
My question is, I have to make the extra large size to accommodate my bust size, but I am
wondering if this size will be to big in the shoulders. When buying ready made clothing
I have to buy to fit the bust, and most often the sleeves are way too long and the
shoulders are too wide. Sweaters are not as problematic though has buying jackets.
Any thoughts on this? I am using cotton-ease.
Linda
hi, finally got to start today, finished my other crochet project, will be using VC in silver heather, hope it will turn out pretty, this is my 1st knit along.
Elaine Greywalker
Thanks for clarifying a simple way to get gauge. I already tried once using the chart and discovered my stitches were too big. So, this time around I will take a simpler route. 🙂
Sandy
Wish the ‘cable needle’ was mentioned under “Materials”. I packed up this project & brought it on vacation with me (had just finished the back and was starting on the front) when I got to the chart & realized I need a cable needle. Didn’t bring one, and since I’m in a fairly remote area without a selection of ‘craft’ shops around, my project has come to a screeching halt :(.
Sandy Stadelmann
There is method to do cables without the needle. You-tube has good instructional videos. I have done it and as if it’s a small cable it works great and is much easier than dealing with the cable needle.
Laurie J Montgomery-college
If like me you are knitting on something close to size 10 needles just use a pencil or pen, I have even used things like coffee stirrers. All you need is to put the few stitches on hold for a bit then slip them back to knit them.
Ashley Tedesco
Hi Sandy! The good news is that there is indeed a way to do cables without a cable needle. We explain it step-by-step in this blog post: http://blog.lionbrand.com/2011/11/07/how-to-cable-without-a-cable-needle/
Pajamazon
It appears there’s a mistake in the pattern. The ribbing is Row 1: K2, P2. Row 2: Knit the knit stitches and purl the purl stitches. This doesn’t make ribbing. Unless I’m missing something, shouldn’t it be Row 2: Purl the knit stitches and knit the purl stitches?
Stella
Generally when a pattern tells you to knit the knit stitches and purl the purl stitches, you do them as they appear from the side you’re working. The purl stitches you made on the RS look like knit on the WS, so you knit, and the knit from the RS look like purl on the WS, so you purl.
Olga
Heather,
How did you decide which section of the lace pattern to check your gauge from? I cast on 20 and got the correct needle size and gauge in stockinette stitch and want to work the lace to make sure my swatch doesn’t “pull” or become “wider”. Should I just work in stockinette and only YO, ignoring the purls?
How to Resize Your Knitwear Pattern | Lion Brand Notebook
[…] Tranquil Tank Top Knit-Along – Gauge Swatching […]
Sharyn
Thank you for this very clear demo on how to measure a gauge swatch. . .this is the first time I’ve understood how to do it!
My top is now underway; I’m about two inches into the ribbing on the back and I’m really happy with how it looks, and am hopeful that at the end, it will fit, too. (The first sweater I ever tried to knit I didn’t measure the gauge correctly and at the end of all my efforts it looked like I’d knitted myself a striped sausage casing.) This one I want to wear. . .!
Anita Keeton
I only have 2 inches to go then I’ll have finished the ribbing. I’m very excited. We are starting on the back, right?
Suzanne Desrosiers Smith
Frustrated. Using Cotton Ease and #9 needles my swatch was 3″, with 10 needles was 3.5, with 11 needles was about 4″ but the resultant fabric was open and loopy.
Ashley Tedesco
Hi Suzanne,
If you’re not crazy about the yarn and needle size combo necessary to get the required gauge, you can consider going a size up in the directions, knowing your knitting will be tighter. For instance, if knitting a size Medium on size 11 needles is too open for your liking, it may be possible to knit a large on size 9 needles and come out with the sweater the size you’d like. You’ll have to work out what exactly that means for your gauge, but don’t give up hope yet!
Suzanne Desrosiers Smith
Thanks for the tip, Ashley! I’m using 10 needles, Vanna’s choice yarn, and the large size directions, and it’s coming out in a size that will fit me. It’s not the cotton top I wanted, but that’s okay. The back is done and I’m up to the left front. I will be watching the video on cables because those are new to me in knit (though I’ve crocheted for over 30 years.)
Patricia Kirby
all welland good but I crochet as I can get my project done faster(meaning they GET done)…have 6-8 knitting projects abandoned because of time constraints.
Ashley Tedesco
Keep an eye out! We’ll be hosting a Crochet-Along this summer! 🙂
Linda Lemire
Hi, your pattern is so nice I want to make it but I look on the web site to find a video to see how to do 2/2 Lc or 2/2 Rc and I Do’nt fint it wher I can find the explanation
Ashley Tedesco
Hi Linda,
Cat Bordhi has a great video here that should help! http://www.youtube.com/watch?v=B9wC7BAuz8I
Linda Lemire
oh thank because I want to do the tranquil tank top but I never do this stich
Tranquil Tank Top Knit-Along - Seaming and Finishing | Lion Brand Notebook
[…] Gauge Swatching […]