
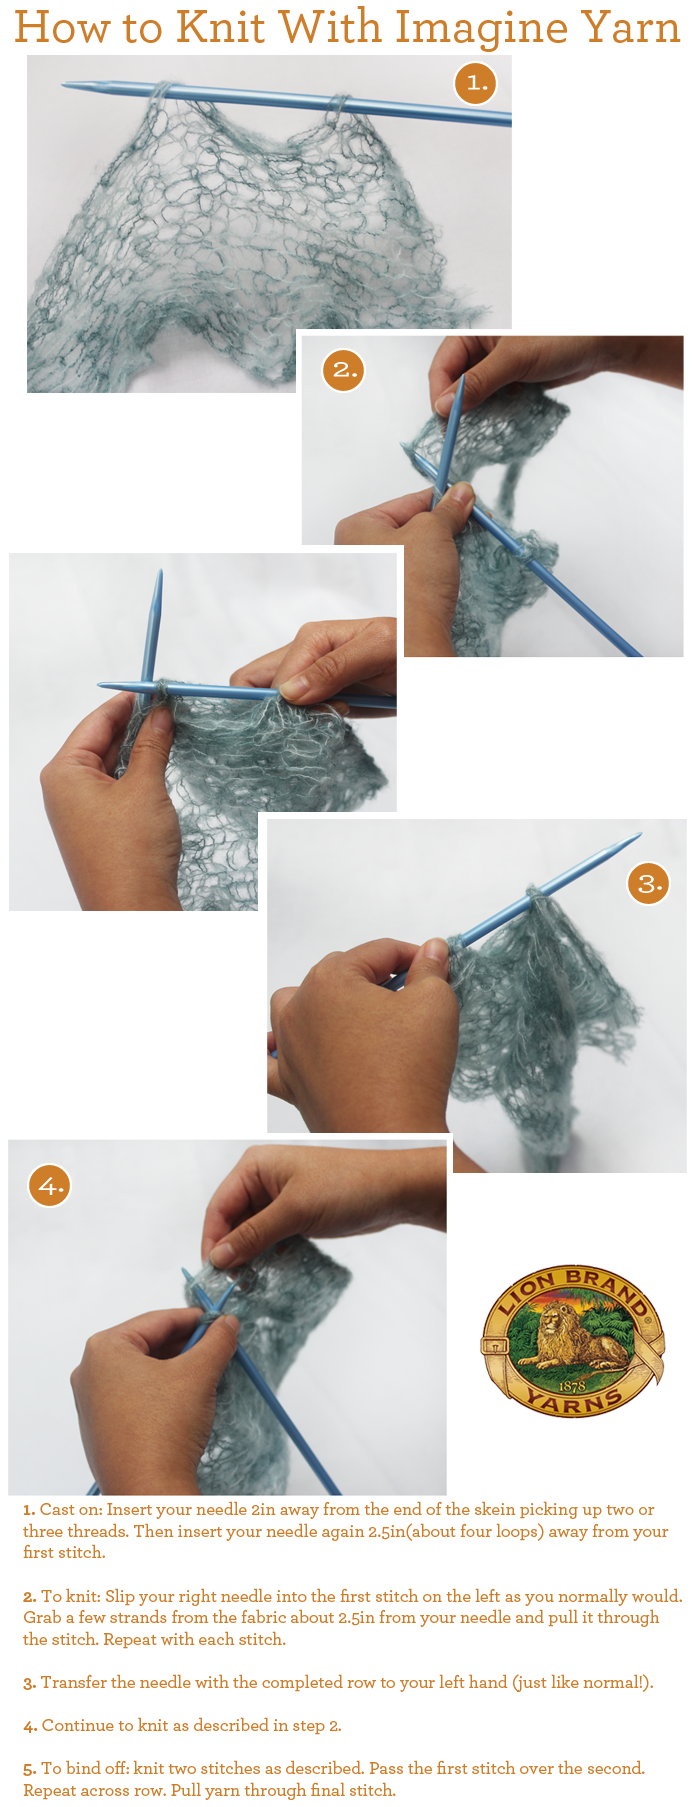
Have you been admiring our beautiful Imagine yarn but can’t wrap your mind around how to knit with it? Imagine’s webbed tubing construction is what makes it unique but it can also seem tricky to work with at first. I’ve broken it down into five simple steps for you so you’ll have the confidence to try it for yourself!
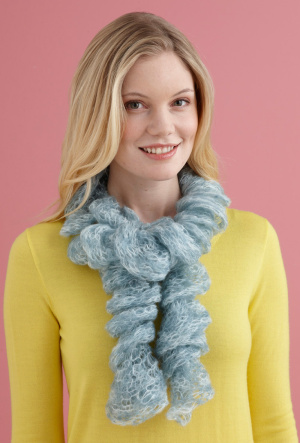
Click here to see the pattern for the project shown on the left!
You must be <a href="https://blog.lionbrand.com/wp-login.php?redirect_to=https%3A%2F%2Fblog.lionbrand.com%2Flearn-to-knit-with-imagine-yarn-in-5-easy-steps%2F">logged in</a> to post a comment.
Joan
This makes a beautiful scarf! Love Love it !!!!!!!!!!!!!!!!!! Also, like to make scarves, and have them on hand, for special occasions. People appreciate them.
Tracy
I must be daft. I still don’t get it. Are you only putting one stitch at a time on the needles?
Zontee
Hi Tracy, the scarf above is knit with two stitches. So the first step is to “cast on” two stitches by putting two loops on the needle (that’s your regular left-hand needle that you knit into).
The next step is to stick your right needle into that first stitch. Instead of wrapping entire yarn around the needle as you normally would, you just pick up a “loop” of the fabric and pull it through (as you would normally do when knitting) and then drop the stitch off the left needle onto the right. Then you repeat with the second stitch.
Then you return your finished row to your left hand and repeat.
The idea is that it is almost like regular knitting except you only pick up a bit of the yarn’s “fabric” instead of wrapping the entire yarn around your needle. Hope that helps!
Tracy
Between your explanation and the video, I got it. Now off to the store to buy some Lion Imagination yarn! Thank you.
Zontee
You’re welcome! Enjoy!
Miki M. Gain
OOOH I get it. I thought I was looking at the completed scarf in picture 1. But that is the whole STRAND of yarn that you pull off the skein. You don’t have to cast on with this stuff, just insert your needle in the “top” row of loopies in the fabric as if they had been cast on. Then you just knit top loopies into the ones you have picked up on your starting needle – rinse repeat.
Tracy
I probably need a video or a live person next to me. It looks simple and fun, but I am just not getting it.
Zontee
Don’t worry–we have a video too: http://youtu.be/f2aBbbu79Tw
Tracy
yeah!
Jerry
I don’t knit. Is there a crochet pattern?
SnarlingBadger
There are crochet tutorials on YouTube for using ruffle yarns. I would think they would work well with this yarn.
Zontee
Hi Jerry, you can find crochet instructions here: http://youtu.be/W3KAo_WTzCU
chris
use a paper towel empty roll, to unwind this on to. this spreads it out. makes it easier to use as you go.
Ruth
Thank you! I will try that. I get so frustrated with the yarn twisting tighter in my knitting bag. I keep having to stop and untwist it. That would be worth the time at the beginning.
Elyse
I love the look of this yarn/ribbon. (: I can’t wait to use it!
Ginger
so glad to see these instructions, my granddaughter and I looked at this yarn for the longest time and could not imagine how you would “cast on” stitches to work with it. Now will buy the yarn the next time I am near a Hobby Lobby (nearest one is 30 mi. away) and give it a try.
missysgirl
so pretty
njgill
I’m really disappointed that your marketing people were so un-“Imagine”-ative that they could not come up with a new and unique name for this yarn. I still have uite a bit of the old “Imagine” in my stash, and I doubt that I’m alone. Trying to have two or more types of yarn with the same name in my inventory is confusing enough when they are produced by different manufacturers, but it happens; however, I certainly won’t be buying any of the “new” product as long as I have unused skeins of the one I started with.
miraclegal
How do you deal with the rough ends?