
 Hi everyone! I hope you guys had a great holiday weekend and those sweaters are coming along nicely! This week I was busy making the fronts of my cardigan. I know a few of you wondering about how the pockets join to the body, so we’ll start with that.
I had a little trouble joining the pockets, as I just assumed I knew what to do, so I didn’t read the pattern carefully, and kept wondering why I didn’t have enough stitches left at the end! Learn from my mistake! To join the pocket-lining, work the number of stitches required for your size, on the body of the cardigan as normal (this is a wrong side row, so it’s all in single crochet), then skip the first stitch of the pocket lining (this is where I kept going wrong!) and work across the top of the lining, skip the last stitch and skipping 17 body stitches from the first join, single crochet in the next body stitch and work to the end.

Click the photo to enlarge.
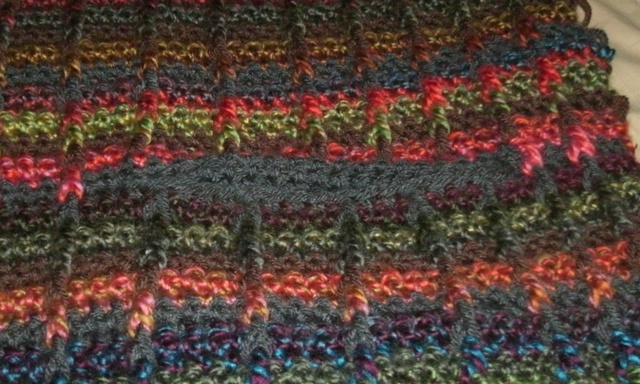
Click the photo to enlarge.
A few of you also had questions about the next part, continuing in pattern across the pocket stitches. Since we have already done some of the decreases for the body, we will want to continue that way so that all the post stitches still line up on top of each other despite the break in the fabric for the pocket opening. So pay special attention to where your decreases are and make sure that when you are working the post stitches on row 37, that you are working the same number of single crochets between them as on row 35.
I love garments with pockets, as I’m notorious for losing things that aren’t attached to me (keys, wallet, etc.) so now I have somewhere to put them! However if you’d prefer to do without the pockets, that’s easy to do: after the decreases on row 33, just work the body even until the next decrease row and then continue following the pattern as written.
Next it’s time for the armhole and neck shaping. Again, just remember to read the pattern carefully as there is shaping on both edges of the garment.
I hope that answered a few of your questions. Next week I’ll be talking about the sleeves and finishing process. The closer I get to finishing, the more excited I am to wear my sweater, especially seeing some of your photos of finished projects!
Related links:
While we will try to answer some questions here on the blog and on Ravelry, we do encourage participants to help each other with questions. Learning from each other’s experience, mistakes, triumphs, and “design elements” is part of the experience! If you need specific, personal help with the pattern, please feel free to email support@email.lionbrand.com and someone from our team can address your question.
You must be <a href="https://blog.lionbrand.com/wp-login.php?redirect_to=https%3A%2F%2Fblog.lionbrand.com%2Fcolorfully-modern-cardigan-crochet-along-3-the-fronts-and-pockets%2F">logged in</a> to post a comment.
Kelley Hartsell
I know you’re planning this week’s blog entry about the sleeves but I’m working on mine right now. I decided to try to get all of the smaller parts done before going back to the larger panels. It makes me feel like I’ve accomplished more that way. LOL Seriously though I DO have a question I need answered fairly quickly since I am at that part of teh pattern right now.
In the section on making the sleeves, it follows the set color pattern up until rows nine and ten. According to the designated stripe sequence, we do A, B C, D E, D then start over again at A. However, right before row 11, when we should be doing the second row of D in teh sequence, it says to change to A. Right after that, it says to continue to change color based on the Stripe Sequence.
Is there a reason we are skipping part of the sequence here? Or is that a mistake? Does it have something to do with attaching the sleeves later on? I’m a “follow the directions” kind of person, but that threw me off, putting that change in there. So I want to make sure before I continue on. I will probably just quit on the first sleeve there and start the second sleeve, unless I get clarifiaction before I’m ready to do that.
Thanks
Lauren CAL Host
Hi Kelley, So sorry for the late response!
Looking at the directions it seems to me that the sleeves still follow the same color pattern i.e. ABCDE…I’m not sure where it says go back to D before starting at A again.
I just followed the same color sequence for the whole sweater.
sweet
In the beginning of the pattern after the pattern stitch explanation, the next paragraph tells you the stripe sequence, ABCDED. But in the pattern it tells you to use ABCDE.
Lauren CAL Host
You are right! Thanks for pointing it out!, it’s hard to tell from the actual sweater, but it does indeed tell you to go ABCDED…ABCDED, I didn’t do this I just did the 5 colors and then repeated them, I was completely happy with the results, so do whatever you think looks best!!
sweet
I have the back done and half of one front and was wondering what Kelley was talking about and noticed it. I, too, did ABCDE. Oh well! Good for you Kelley for noticing that!
Roberta Brown Nizzardo
The pattern does come out to the right color for the pocket if you follow the pattern abcded i noticed the example did not repeat the d. The picture that comes with the pattern looks like a brown row which would be e.
Colorfully Modern Crochet-Along: A Few Fabulous Finished Projects! | Lion Brand Notebook
[…] Colorfully Modern Cardigan Crochet-Along #3: The Fronts and Pockets […]