
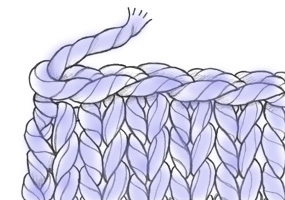
 Techniques for binding off are as numerous as techniques for casting on. There are bind-offs that produce firm edges, looser edges, stretchy edges, edges that look like the pattern stitch used, gathered edges, decorative edges, and bind-offs that join two edges together. It is wise to begin by learning a basic bind-off technique to use with your first few projects. After you have completed some projects, you may be in the mood to learn some new bind-off methods.
It can be a bit nerve-wracking to try a new bind-off for the first time on a valuable piece of knitting. Instead, knit a swatch or two and practice the bind-off technique on the swatch(es). Using a swatch to practice provides several advantages; you don’t risk messing up an important piece of knitting, you can unravel and practice again and again until you are sure you have mastered the technique, and you can see and handle the bind-off edge, checking that it has the desired properties, before committing to using the technique.
Before making a swatch, study the variety of bind-off techniques available. Select a technique that is designed to produce the type of edge desired (e.g. firm, loose, “in pattern”, stretchy), and matches your personal style (e.g. Do you prefer two-needle bind-offs? Are you comfortable attempting a sewn bind-off?). Then knit a small swatch in the appropriate pattern stitch and bind off following the steps for the technique selected.
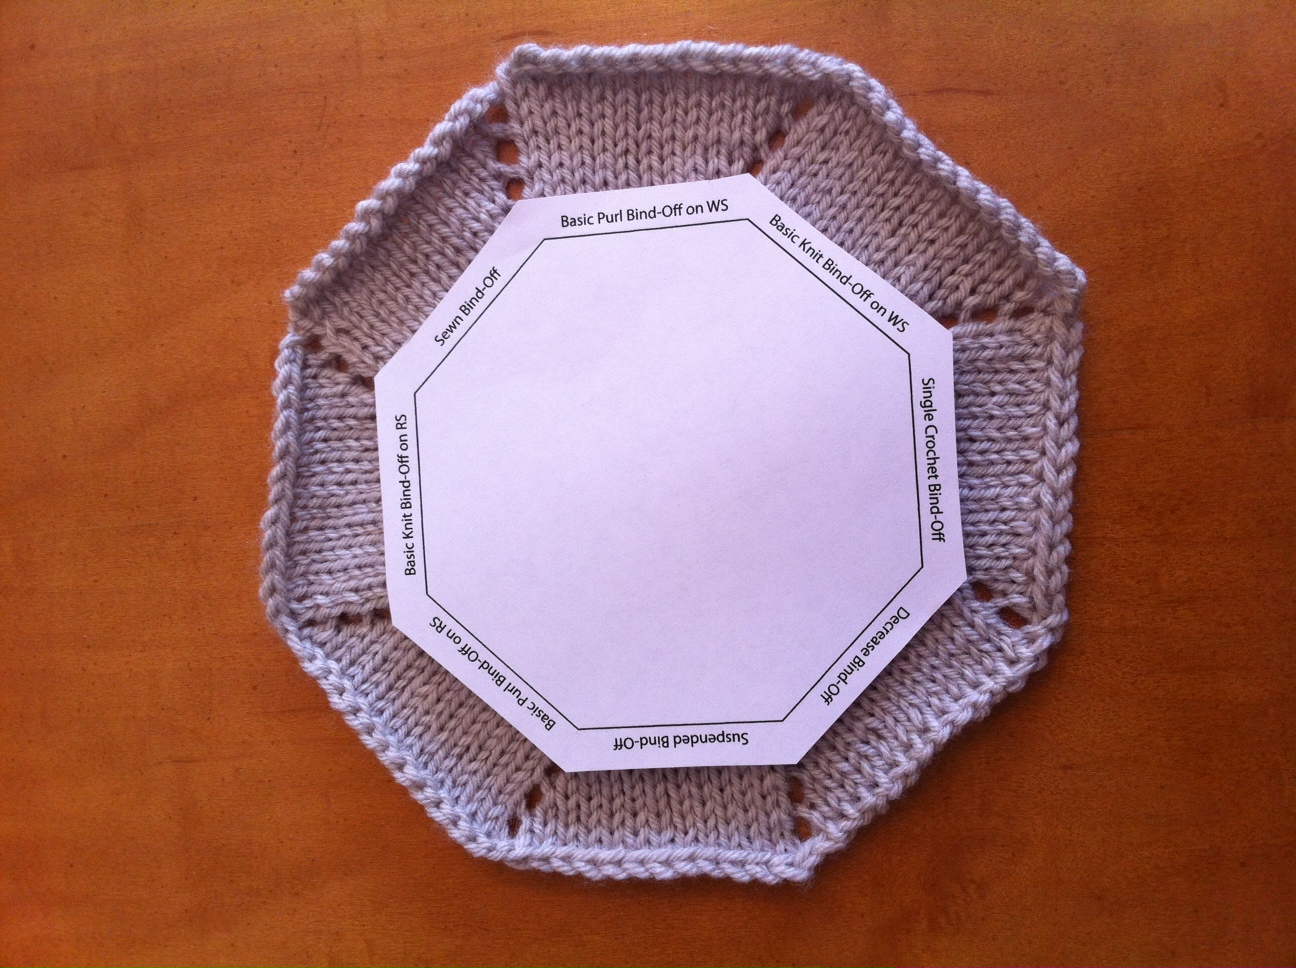
The swatch can be a simple rectangle, or if you would like to practice and compare multiple different bind-off techniques, try our octagonal or square bind-off samplers. The samplers are a great way to practice and to study the differences between bind-offs. Some of the differences are very subtle, others are quite noticeable. Detailed instructions for each bind-off technique appear following the sampler photos. See the previous blog post for details on the different bind-off methods mentioned below.
MATERIALS (for both samplers)
Cast on 16 sts. Divide sts onto 4 needles (4 sts per needle). Place marker for beg of rnd. Join by working the first st on left hand needle with the working yarn from the right hand needle and being careful not to twist sts.
Rnd 1 (RS): Knit.
Rnd 2: (K1, yo, place marker (pm), k2, yo, pm, k1) 4 times – 24 sts at the end of this rnd (2 sts each between yarn overs (yo)).
Note: The sections of Stockinette st span the end of one needle and the beginning of the next. This ensures that you will not have to make a yarn over at the end of a needle, reducing the chances that it will fall off or become elongated.
Rnd 3: Knit.
Rnd 4: (K2, yo, slip marker (sm), k3, yo, sm, k1) 4 times – 32 sts at the end of this rnd (3 sts each between yarn overs).
Rnd 5: Knit.
Rnd 6: *(K to marker, yo, sm) twice, k to end of needle; rep from * 3 more times – 40 sts (4 sts each between yarn overs)
Rnd 7: Knit.
Rnds 8-19: Rep last 2 rnds 6 more times – 88 sts at the end of Rnd 18 (10 sts each between yarn overs).
Bind-Off Rnd:
Remove the end of round marker. Remove all other markers as you come to them.
Knit to the first marker.
[Click here for the previous blog post for details on each bind-off method.]
Basic Knit Bind-Off on RS: Use Basic Bind-Off to bind off the next 11 sts, knitting the sts as you bind off.
Basic Purl Bind-Off on RS: Use Basic Bind-Off to bind off the next 11 sts, purling the sts as you bind off.
Suspended Bind-Off: Use Suspended Bind-Off to bind off the next 11 sts, knitting the sts as you bind off.
Decrease Bind-Off: Use Decrease Bind-Off to bind off the next 11 sts, knitting the sts together as you bind off.
Single Crochet Bind-Off: Use Single Crochet Bind-Off to bind off the next 11 sts.
Basic Knit Bind-Off on WS: Knit the next 11 sts and turn the work so the WS is facing you. Use Basic Bind-Off, knitting the sts as you bind off. Cut yarn.
Basic Purl Bind-Off on WS: With WS facing, rejoin yarn at the beginning of the next 11 sts. Use Basic Bind-Off to bind off the next 11 sts, purling the sts as you bind off. Cut yarn.
Sewn Bind-Off: With RS facing, use Sewn Bind-Off to bind off the next 11 sts.
Cut yarn and weave in ends. If desired, weave beginning tail through cast-on stitches and pull to gather opening at center of swatch.
Click here to get the label as a PDF.
Cast on 26 sts. Divide sts onto 4 needles, placing 7 sts each on first and 3rd needle and 6 sts each on 2nd and 4th needle. Place marker for beg of rnd. Join by working the first st on left hand needle with the working yarn from the right hand needle and being careful not to twist sts.
Rnd 1 (RS): On first and 3rd needle: K1, p1 (for K1, p1 Rib), k1 (for corner st), p2, k2 (for K2, p2 Rib); On 2nd and 4th needle: P2 (for K2, p2 Rib), k1 (for corner sts), p1, k1, p1 (for K1, p1 Rib).
Note: The sections of K1, p1 Rib and K2, p2 Rib span the end of one needle and the beginning of the next. This ensures that you will not have to make a yarn over at the end of a needle, reducing the chances that it will fall off or become elongated.
Rnd 2: On first and 3rd needle: K1, p1, yo, place marker (pm), k1, yo, p2, k2; On 2nd and 4th needle: P2, yo, pm, k1, yo, p1, k1, p1 – 34 sts at the end of this rnd (9 sts each on first and 3rd needles, 8 sts each on 2nd and 4th needles).
Rnd 3: On first and 3rd needle: K1, p1, k1, slip marker (sm), k1 (corner st), k1, p2, k2; On 2nd and 4th needle: P2, k1, sm, k1 (corner st), (k1, p1) twice
Rnd 4: On first and 3rd needle: K1, p1, k1, yo, sm, k1, yo, k1, p2, k2; On 2nd and 4th needle: P2, k1, yo, sm, k1, yo, (k1, p1) twice – 42 sts at the end of this rnd (11 sts each on first and 3rd needles, 10 sts each on 2nd and 4th needles).
Rnd 5: K the knits sts, p the purl sts, and k or p the yarn overs (yos) as needed to maintain the K1, p1 Rib and K2, p2 Rib patterns, slipping markers as you come to them.
Rnd 6: On first and 3rd needle: Work in K1, p1 Rib as established to marker, yo, sm, k1, yo, work in K2, p2 Rib as established to end of needle: On 2nd and 4th needle: Work in K2, p2 Rib as established to marker, yo, sm, k1, yo, work in K1, p1 Rib to end of needle – 50 sts at the end of this rnd (13 sts each on first and 3rd needles, 12 sts each on 2nd and 4th needles).
Rnd 7: Rep Rnd 5.
Rnds 8-17: Rep last 2 rnds 5 more times – 90 sts at the end of Rnd 16 (23 sts each on first and 3rd needles, 22 sts each on 2nd and 4th needles).
[Click here for the previous blog post for details on each bind-off method.]
Bind-Off Rnd:
Remove beginning of rnd marker.
Knit the k sts and purl the p sts to the first marker. You should now have 18 sts between first and 2nd corner sts, 17 sts between 2nd and 3rd corner sts, 18 sts between 3rd and 4th corner sts, and 17 sts between 4th and first corner sts.
Remove all markers as you come to them.
Basic Bind-Off in K2, p2 Rib: Use Basic Bind-Off to bind off corner st and all sts to next corner st, knitting each knit st and purling each purl st as you bind off.
Basic Bind-Off in K1, p1 Rib: Use Basic Bind-Off to bind off corner st and all sts to next corner st, knitting each knit st and purling each purl st as you bind off.
Bind Off in K2, p2 Rib using Larger Needle for row before Bind-Off: Change to a larger needle and work in pattern to next corner st. Bind Off in Pattern using Larger Needle to bind off next corner st and all sts to next corner st. Note: Since the sts are on a double pointed needle, you do not need to transfer them before beginning the bind-off. Simply begin the bind-off at the end of the double pointed needle farthest from the tail/working yarn.
Tubular Bind-Off in K1, p1 Rib: Fasten off the corner st. Use Tubular Bind-Off to bind off all remaining sts.
Cut yarn and weave in ends. If desired, weave beginning tail through cast-on stitches and pull to gather opening at center of swatch.
Click here to get the label as a PDF.
You must be <a href="https://blog.lionbrand.com/wp-login.php?redirect_to=https%3A%2F%2Fblog.lionbrand.com%2Fbind-offs-great-endings-to-your-knitting-project-pt-1%2F">logged in</a> to post a comment.

Judith
Maybe my eyes aren’t open yet, but although you refer numerous times to “basic bindoff”, nowhere do I see it defined or demonstrated!!!? Are we supposed to go to How To??
Judith
Zontee
Hi Judith, sorry for the confusion! See the companion blog post for those directions: http://blog.lionbrand.com/2013/06/11/bind-offs-great-endings-to-your-knitting-project-pt-2/
Beth
Or directions for any of the others, like suspended or decrease bind-offs.
Zontee
Hi Beth, sorry for the confusion! See the companion blog post for those directions: http://blog.lionbrand.com/2013/06/11/bind-offs-great-endings-to-your-knitting-project-pt-2/
readknits
how do we print the template?
Zontee
Hi there, good suggestion! I’ve asked Kj to provide the label templates and added them to the blog post. You can get them here:
http://blog.lionbrand.com/wp-content/uploads/2013/06/Swatch-Labels.pdf
http://blog.lionbrand.com/wp-content/uploads/2013/06/Knit-Swatch-Labels_Rib.pdf
Jessica-Jean
I love that you’ve made this series on bind-offs. All I could wish more would be to have the entire thing available as a pdf. As it is, I’ll be spending awhile just doing copy/paste into Word.
I’ll be duplicating your sample swatches, and they’ll end up added to my Swatch-Catcher Blanket http://www.ravelry.com/projects/JessicaJean/whimsey-blanket, but the actual bind-off edges will be left free, not stitched down.